Showing posts with label Craft. Show all posts

07 September, 2011

Angry Bird

A good friend's kids are Angry Bird mad. But looking around here, who doesn't seem to be? Their birthday was coming up and I had a crafting itch that HAD to be scratched. So a quick mini project that took me just an evening.
Using my felt stash (which is so big - I don't really know why), googly eyes and pom poms (All from Daiso). I packed a little Angry Bird kit.

Wrapped it with my extensive ribbon and wrapping paper stash (again, how did it ever get so big?!) All ready to be delivered to the birthday kiddos.
P.S. According to mum, they loved it. (With photos to prove) But I can't post that here.

01 September, 2011

Teacher's Day

I've been looking for an excuse to do some craft with the kid and so the upcoming Teacher's Day was godsend.  We often do coloring and random doodlings but I always find it difficult to decide what to do with the end products.  It seems like a waste to throw them away and yet keeping them only adds to the amount of things we already have.  So a "productive" craft that can be given as a gift is always a bonus for me - all I need is an excuse!
There are many food jar ideas on the web - ranging from home made food like cookies and cakes to premixes.  I toyed with many recipes and finally settled on a multigrain soup with chicken recipe.  The bottles were colorful enough and the ingredients were easy enough for a toddler to handle.

Things we learnt along the way:
  1. Measurements with the cup
  2. Fine motor skills in pouring 
  3. How to use a funnel and how funnels help make work easier
  4. Different shapes, sizes and colors of grains and how different ones pour with different ease through the funnels
  5. Taste and smells of different herbs and spices
The little one loved the exercise and had lots of fun with the cup and funnel.  There wasn't much of a mess as I handled the herbs, distracting him with smelling and tasting the herbs.  I'm actually quite optimistic that we could try this again perhaps for Christmas!  We added instructions and a thank you card to the jar.
What did you do for Teacher's Day with you child?

Multigrain Chicken Soup
(Modified from here)
In the jar
3/4 cup raw brown rice
1/2 cup medium barley
1/2 cup red lentils
1/2 cup yellow split peas
2 tbs dried parsley
1 tbs dried thyme
1 tsp ground ginger
1 tsp dried marjoram
1/2 tsp ground black pepper
Instructions attached

  1. Pour contents of jar into pot and add the following:
    1. 2 large ribs celery, sliced
    2. 4 large carrots, sliced
    3. 2 cloves garlic crushed
    4. 1 pound boneless, skinless chicken breasts, cut into bite-sized pieces
    5. 12 cups of water
    6. Salt and pepper to taste
  2. Bring to a boil.
  3. Cover the pot and turn down the heat to simmer.
  4. Cook for 1 hour until all grains are tender.
  5. Check seasonings.
  6. Thin with water or chicken stock as required.

14 March, 2011

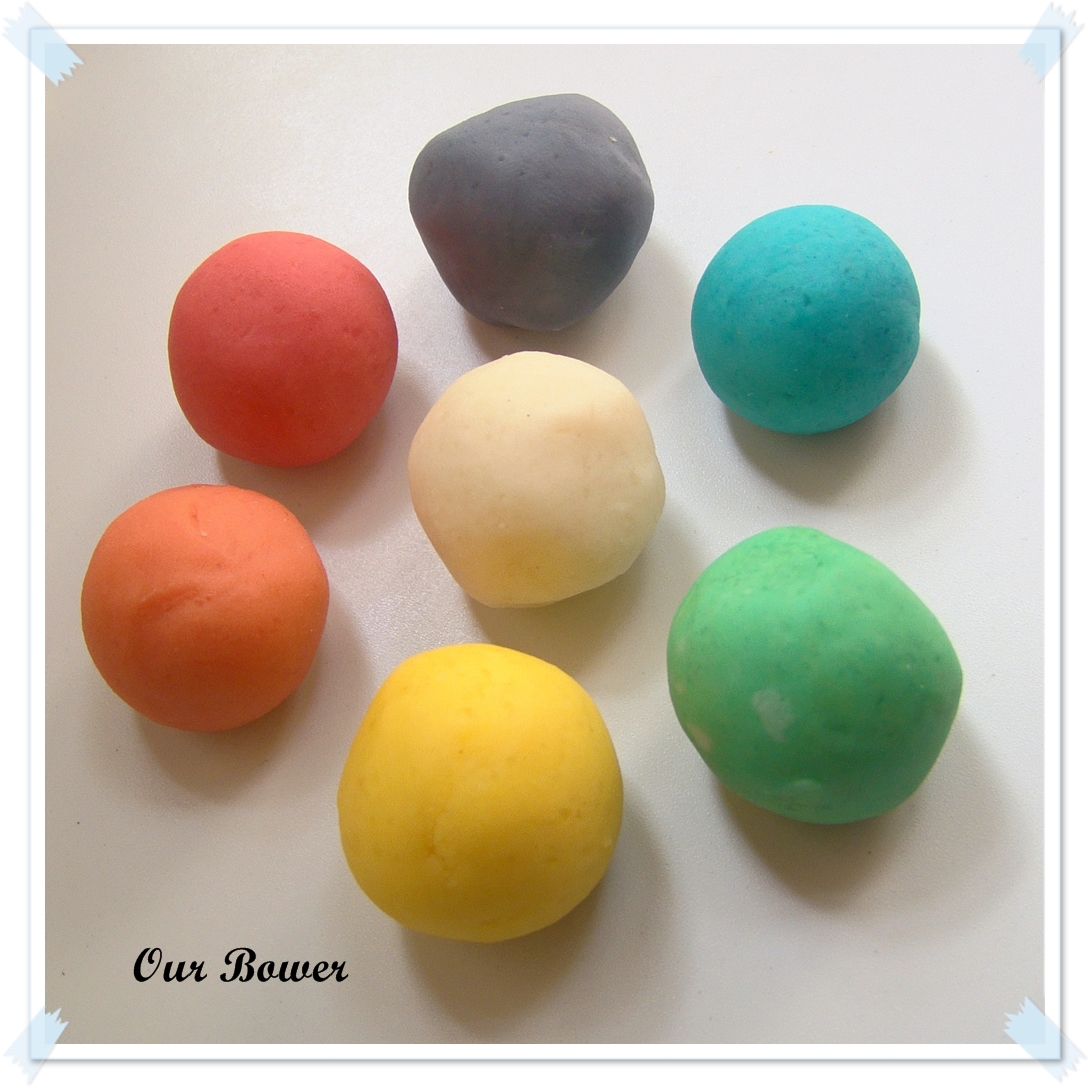
Play dough on a dime.

The tot loves play dough.  Actually, I haven't met a child who didn't like playdough. The texture of something squishing in your hands, the endless possibilities of the lump of dough and the bright colors are definitely a draw.  I like the idea that it exercises the little fingers and improves fine motor skills, works the imagination and best of all, engages the kid so that I can have a little time to do all the this and thats!
One thing I don't like about playdough is how they end up mixing together and becoming an ugly lump of dough.  Not that the tot actually minds.  But the OCD in me gets really annoyed.  And it would be so wasteful chucking that out and buying a new lot too!
Also, dough does dry out eventually and get yucky with bits of this and that stuck in it.  And dough stuck on carpets or clothes are quite a pain to remove.  The biggest worry is the ingestion of the dough!
Which is why I LOVE homemade playdough.  Cheap enough to chuck when it's turned grotty, safe enough to be ingested and so many colors to choose from!   If it's stuck on clothes, soak the clothes and then the dough dissolves and you can rinse it out with no problems!
The sky is literally the limit with these things.  I bought a cheap rolling pin and a set of cookie cutters, added some plastic utensils and recycle some plastic food containers and the viola!  A cheap toy that entertains the little one for hours at a time.
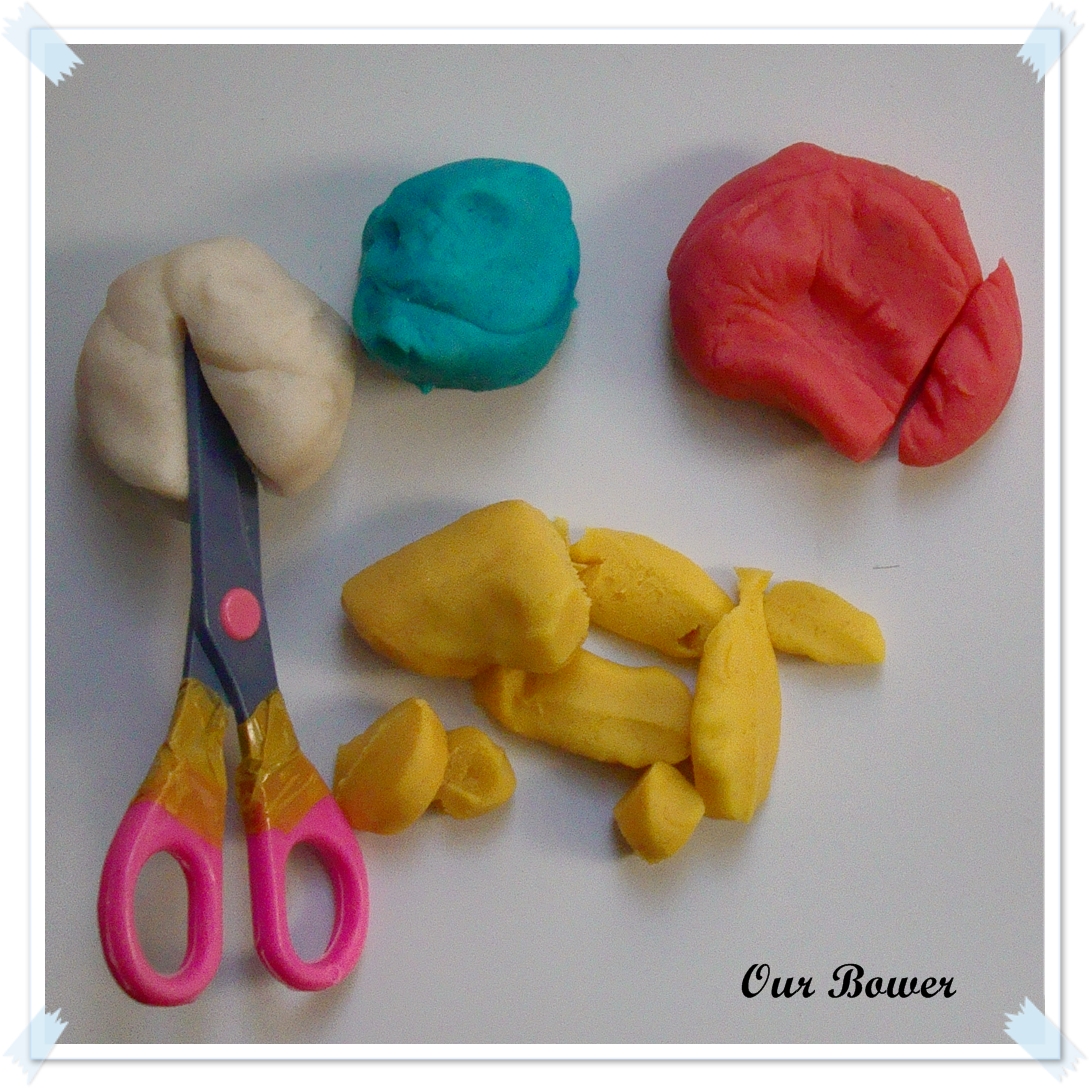
One other thing that I have found playdough to be particularly useful is in training the little one in how to use the scissors. I bought him a safety scissors that is made of plastic.  Unfortunately, it actually takes more skill than a normal scissors to cut nicely through paper.  However, with the playdough, no problems at all!  And he doesn't get himself nicked.
I'm hoping to teach colors using playdough and mixing them up. But seeing how the tot can't even consistently identify basic colors, I may have to leave it to later!

I've tried many of the recipes online and find that the cream of tartar version the best.  The recipe using baking soda and cornstarch resulted in a rather slimy afterfeel which I didn't like at all.  The "no cook versions" are largely similar to cooked versions seeing how boiling water is used. I use the no cook version as that allows me to involve the tot in the mixing.  He mixes with a wooden spoon in a huge mixing bowl and only after I've mixed the mixture enough to not have any liquid in the bowl.  The boiled version tends to result in a salt crust on the dough after a while so I don't really fancy that method either.

There are a thousand and one recipes online and this is the base recipe.  A lot of people add flavors and such to the dough and yes, they smell delicious!  But I don't.  There really is no need to encourage my greedy tot to mouth the dough with the delicious smells even if it's safe.

Here's the recipe I use!  Do you have any non toxic recipes for crafts for children?  I would love to hear from you!

Playdough
1 cup all purpose flour
1 cup boiling water
1 tbs of cooking oil
1/2 cup salt
4 tablespoons cream of tartar
food coloring
  1. Combine the flour, salt and cream of tartar in a mixing bowl.
  2. Mix the cooking oil with the boiling water.
  3. Pour the boiling water over the dry ingredients and mix continuously until smooth.
  4. Knead in your preferred food color.
Have fun!

12 March, 2011

Round and round we go!


When I saw this at abstractoctopus, it went straight to one of my book marks.  I wanted a less bulky look so I cut up my magazine papers into 1/16s and folded that down halfway.  Me and my ambition - I paid sorely for that.  I was tearing magazines for days!

Instead of gluing it and using a bulldog clip to hold it together, I just rolled it into 1 big roll using scotchtape to join up the papers.  Then I used my glue to spread it all over and allow for it to seep between the cracks.  I'm out of modge podge but the normal glue seemed to work just fine!

The tot has staked his claim on it already and has been using it for his doodads.  It was fun making but I doubt I'll make another one.  Too time consuming for impatient ole me!

Do you have any other ideas on how to make fancy boxes out of magazine paper?

Have a look here for more ideas on how to use up those magazines!

05 March, 2011

Home made rubber balls...


Do you remember the rubber band skipping ropes we made as children to play "Zero point" and those rubber balls that would bounce almost as high as the point at which they were dropped?  I do.  And when I googled zero point, it said it was a "traditional" game.  That made me feel old in an instant!

Anyhow, the tot is too young to play zero point and I had a lot of rubber bands.  So I thought, why not make a rubber ball with them?  So I wound rubber bands over one another repeatedly.  It's that brainless and easy.

The ball bounces quite well but I would highly recommend that you do not encourage any throwing - it hurts if you are hit with it!  And play with it outside.  The window can shatter from the impact.  It's that solid.

26 February, 2011

Paper baskets!

I came across zipper8design's woven basket (which was inspired by Nifty Thrifty Things) and had to try my hand at it.  It also fell right into my theme of recycling magazines currently - perfect!

It wasn't easy to do initially.  But once I got the idea of what was actually going on, I couldn't stop.  I ended up making 4 in 1 sitting.

I loved how it contained my sewing thread and needles altogether when I was doing my mending.  No more digging around for the spool that has rolled off the table!
The tot asked that I make one into a basket - which I happily obliged with my 1st trial version.  He carried it around, proclaiming that he was going to the market!
I made some modifications as I went along, using all the tips from Zipper8Design and Nifty Thrifty Things.  Nothing major but it helped me make the baskets with a bit more ease.
  1. I used magazine paper instead of newspaper - the paper weight is heavier so I folded the strips twice only and got it stiff enough.  When I folded it thrice, the paper was a bit too stiff and kept coming apart.  
  2. As the paper strip length was also shorter, I cut down the number of strips to 6x6.  When I tried anything more than that, I got a very shallow container and it was very difficult to keep the shape as the strips wouldn't catch well.
  3. I used 1 cm strips - the thinner the strips, the narrower the base of the basket and the taller the basket.
Hope this inspires you too!  Have fun!

Have a look here for more ideas on how to use up those magazines!

23 February, 2011

Teaching tiny fingers on the cheap


It's important for toddlers to practice their fine motor skills as this helps them learn to use their fingers and improve their dexterity.  One of the recommended activities is to string up pasta with a string to form a necklace. However, I'm not exactly keen that the tot "plays with food" as I'm concerned that he would get confused with real food.


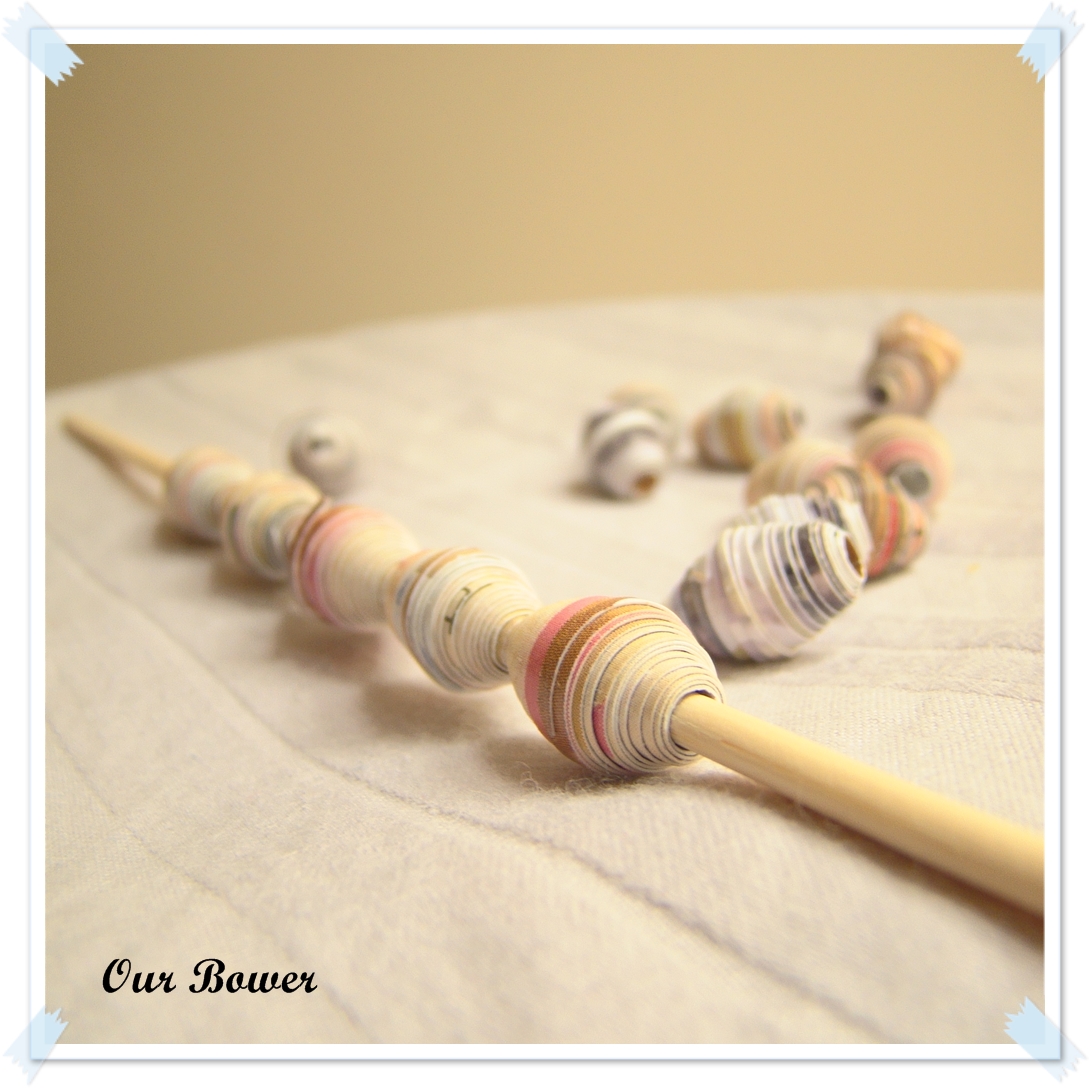
My solution?  Paper beads!  With my stack of magazines growing, I had lots of material.  It's a very, very simple project and you can even involve your child in making them.  After the beads dried, the tot has been having fun threading them onto the stick again.  He also uses them to count and treats it like "money"!

Paper beads
Material
Colorful paper
Ruler
Pen knife
Glue
Satay stick

Instructions
  1. Using the ruler, cut the paper into long triangular strips.
  2. Apply a small amount of glue to the paper on the "wrong" side of the paper (the side that is to be hidden).
  3. Using a stick, roll the paper tightly around it, starting from the broader end.
  4. Allow glue to dry before removing from the stick.
Tips
  1. Heavier paper gives you larger beads, as with longer strips of paper.
  2. You can use "wet glue" or tape glue.  Tape glue may be less messy but trickier for toddlers - I don't let my tot near it as he ended up unwinding the entire reel once!
  3. Varying the width of the strip's base varies the length of the bead.
  4. You can actually spray the beads evenly with lacquer if you intend to wear these beads!
Have a look here for more ideas on how to use up those magazines!

21 February, 2011

Using up those magazines

Looking at the stack of old magazines that I had ploughed through, part of me said "Just chuck them in the recycling bin!".  Another part said "What could you do with these?"  So this is the list that I made:
  1. Using it to wrap breakable things for packing - it sure beats the carbon that is left behind from the newspapers we usually use.  Much cleaner in my opinion!
  2. Shredding it and using it as stuffing in wrapping presents - cheaper than using new colored paper.
  3. Make disposable boxes - very useful for messy craft times and dinners with loads of cast offs e.g. crab eating sessions
  4. Make paper chains - fast and easy decoration for parties and the like
  5. Origami - endless possibilities!
  6. Make paper beads - the kids love it for stringing or playing.  Their imagination is the limit!
  7. Make paper dolls - I love cheap toys that allow children to use their imagination.  Can you tell?
  8. Make collages - I remember doing this when I was in Primary school!
  9. Paper basket weaving - great as containers!
  10. Paper boxes - it can look nicer than you think!
Hopefully, I'll be able to put up some photos of the above projects (if I get to do them!) over time with instructions.  Watch this space!