26 March, 2011

Oranges and lemons, say the bells of St Clement's

I love my citrus fruits.  If you made me pick a favorite, it would be hard as each one has it's advantages and each shines in different dishes.  Oranges - sweet and juicy, great on their own or in dishes, lime - fantastically fragrant zest, lemons - slightly less sharp than lime but that heady fragrance!  Even grapefruit is great with sugar syrup!
But the ones that I cook most with are lemons.  They can be quite costly in Singapore some times and it's not like I cook with them every single day to warrant me buying them fresh every week.  So I buy them when they are cheap and freeze them.
Obviously, one doesn't freeze the lemon just like that, unless you cook the entire lemon whole in your dish.  So I separate out the zest and the juice.  First I wash the lemons clean and dry them well and then proceed to zest them.  I have a confession to make - I don't own a microplane nor do I own a zester.  I use a fruit peeler and take off the zest in huge chunky pieces and freeze them. If my recipe calls for thin zest, I just chop the zest up finely.  It has worked well for me all this time but I'm sure purists would be up in arms seeing how I actually have a fairly significant amount of pith on the zest.  Again, the untrained palate of my husbands can't detect the difference so I blissfully continue what I'm doing until such a time where I can get my hands on a zester.

Then I cut the lemons in half and juice them.  Again, I do not have a juicer.  Terrible isn't it?  I cut my lemons right down the thickest point and use a dessert spoon to break each sac open nicely and twist my spoon round and round.  The juice drips into a bowl and I strain it through a sieve right into my ice trays.

The zest goes straight into small ziplock bags (which I reuse) - 1 lemon, 1 bag.  The juice is frozen into ice cubes and I bag them into ziplock bags too.  1 ice cube of juice is about 2 tablespoonfuls of juice.  I label the bags with dates on sticky labels and know that I'll always have lemon at hand!


Then the remains of the pulp and all go into a bowl with some water and get blitzed in the microwaves for 2 minutes.  Then the oven gets a good wipe down.  Clean and fresh smelling!  And all the lemons get used up!

I.C.E. cards

In Case of Emergency. I.C.E.  With yet another earthquake, this time in Myanmar, it has gotten me thinking of what we should be preparing for emergency situations.  Granted, Singapore is very blessed not to be directly affected by such natural disasters, but one should be prepared, right?

The first up on my list was a little card to place in our wallets.  When we are out and about, we almost always bring our wallets and that's the first thing the doctors in the emergency look for to identify patients who come in through the doors and are unable to tell them anything. 

This inspiration came from an article I read some time back about I.C.E. numbers one puts on the handphones.  Since no one would know who your next of kin is, storing a phone number under I.C.E. allows people to know who to call just by looking for I.C.E.

Since the card is supposed to be the size of a credit card, I had to be very succinct and I decided to put the following information:
  1. Name
  2. Identity card number
  3. Next of kin and phone number
  4. Drug allergies
  5. List of ailments
  6. List of medications taken on a regular basis
  7. Any alerts e.g. Advanced Medical Directives / Organ donor opt outs
While having it doesn't necessarily mean that it would be found (wallets may not be on us at the time or something) but when it is found, it would make things so much easier for everyone.

(Disclaimer:  This post constitutes only what I have decided to put on our personal cards and not any form of advice.  If you aren't sure what you should put on your I.C.E. card, please do consult your family physician!)

23 March, 2011

Trying out gluten free

Thankfully, coeliac disease isn't very common in Singapore. But I've always been quite facinated by recipes which are gluten free because wheat flour is found in so many baked goods that it makes me wonder if “gluten free” would actually be any good.  Lemon, rosemary, polenta cake is just that and it definitely sounded yummy enough.  So I tried baking a batch.
My verdict? By jolly they ARE good! Every mouthful was a burst of lemon and a whole lotta bite. A little more crumbly then if it would have been if wheat flour was used but it meant that there was a slight grittiness that would only come with polenta.

The first batch was iced but that got devoured quite fast. People were coming back for seconds. By the 2nd batch, I had run out of caster sugar so I only made a syrup. Both recipes have been included below. Icing is definitely a little sweeter but I concentrated the lemon by boiling so it wasn't all that sweet!

The only slight little thing that could have been better is less oil but it would affect the moistness of the cake. The lemon cut through the butter and made it an extremely palatable cake which made me come back for 2nds and 3rds (and would have been more if it weren't for the fact that there were none left!) Otherwise it was downright dreamy.

Lemon rosemary polenta cake
Adapted from Not Quite Nigella
Makes 14 cupcakes

Ingredients
110g almond meal
110g polenta
2 tbs chopped up fresh rosemary
Zest of 2 lemons
1 tsp baking powder
200g butter at room temperature
¾ cup caster sugar
3 eggs, beaten
1 tsp vanilla essence
3 lemon juice ice cubes melted (about 6 tbs)

Method
  1. Preheat oven to 180 degrees celsius
  2. In a mixing bowl, whisk the polenta with the lemon zest, rosemary, almond meal, and baking powder.
  3. Cream the sugar with the butter until well combined.
  4. Beat the vanilla essence into the eggs
  5. Whisk in the eggs a little at a time until well combined.
  6. Whisk in the lemon juice.
  7. Slowly fold in the dry ingredients.
  8. Pour cake mix into lined cupcake tins.
  9. Bake at 180 degrees celsius for 30 minutes.
Notes
  1. Mixing the eggs a little at a time ensures that it is easier to create a homogenous mixture.
  2. Use finely milled polenta for a more refined finish.
Lemon polenta cake icing
Ingredients
2 lemon juice ice cubes (melted)
6 tbs of caster sugar

Method
  1. Mix the caster sugar into the lemon juice.
  2. Pour icing over cakes.
Notes
  1. If you want a “dribbled effect” of icing over cake, increase the amount of lemon juice to sugar ratio.
  2. If you want a more tart kind of icing, you can boil the lemon juice a bit to concentrate it. But that would mean using more lemon ice cubes. Play around until you get the exact texture and taste you want.
Lemon polenta cake syrup
Ingredients
5 lemon juice ice cubes
1 tbs chopped fresh rosemary
4 tbs caster sugar

Method
  1. Boil lemon juice with rosemary until it just starts to bubble. Leave to stand until cool.
  2. Pour lemon juice through sieve.
    Add caster sugar 1 tbs at a time until well dissolved.
Notes
  1. The rosemary is great if the syrup is fresh. But the fragrance leeches out after I kept it overnight.
  2. If you don't like the syrup too tart, substitute water instead.

20 March, 2011

Chocs ahoy!

It has been a dreadful week.  Never any good news when you open the newspapers.  It just seemed frivolous posting about my craft and cooking at that point.  But it was great to see so many people doing their best to help out and my prayers go out to all the war torn and disaster stricken countries.  We are indeed lucky in Singapore that we aren't plagued by disastrous natural disasters.

We all needed some cheering up so I whipped up a batch of double chocolate chip and nuts cookies. 

I love my chocolate. As a child, I loved it sweet and milk. But as with many things, as I got older, my tastes changed. Now I love my chocolate slightly bitter and dark. Too much sugar is a no-no and I feel that it spoils the taste. Which is why I tend to avoid buying commercial cookies unless they come highly recommended. DIY is always the best isn't it? You get to control what goes in and how much.

This recipe is modified from You Made That as I didn't have some of the required ingredients. I was also impatient and didn't want to wait 1 hour for the dough to chill so I scooped the cookie mixture and dumped it onto the baking tray directly. Still tasted fantastic.

Double chocolate chip and nuts cookies
Ingredients
125 g unsalted butter
3 large eggs
½ cup sugar
9 tbs cocoa powder
1/3 cup all purpose flour
½ tsp baking powder
100 g dark chocolate chips
1 cup chopped almonds

Method
  1. Preheat oven to 180 degrees Celsius.
  2. Melt the butter over the stove – don't let it boil.
  3. Whisk the eggs and sugar together until well mixed.
  4. Sift the cocoa powder, all purpose flour and baking powder together.
  5. Whisk the melted butter into the egg and sugar mixture.
  6. Add the dry ingredients to the wet ones.
  7. Add the dark chocolate chips and almonds and mix well.
  8. Place tablespoonfuls of cookie mixture onto a sheet of baking paper, leaving 2.5 cm in between.
  9. Bake for 15 minutes.
  10. Take cookies out of oven and cool on a baking rack.

Notes
  1. Unsalted butter is more expensive than salted butter and with good reason. It contains less impurities and has a higher smoking point. But I'm cheap – I use salted butter. The family still can't tell the difference.
  2. Let the butter cool – if it's too hot, it will cook the egg!
  3. Leaving the space between cookies allow the cookies to expand – which they do! I was impatient and tried to cram more cookies in and ended up with a cookie sheet once!

14 March, 2011

Play dough on a dime.

The tot loves play dough.  Actually, I haven't met a child who didn't like playdough. The texture of something squishing in your hands, the endless possibilities of the lump of dough and the bright colors are definitely a draw.  I like the idea that it exercises the little fingers and improves fine motor skills, works the imagination and best of all, engages the kid so that I can have a little time to do all the this and thats!
One thing I don't like about playdough is how they end up mixing together and becoming an ugly lump of dough.  Not that the tot actually minds.  But the OCD in me gets really annoyed.  And it would be so wasteful chucking that out and buying a new lot too!
Also, dough does dry out eventually and get yucky with bits of this and that stuck in it.  And dough stuck on carpets or clothes are quite a pain to remove.  The biggest worry is the ingestion of the dough!
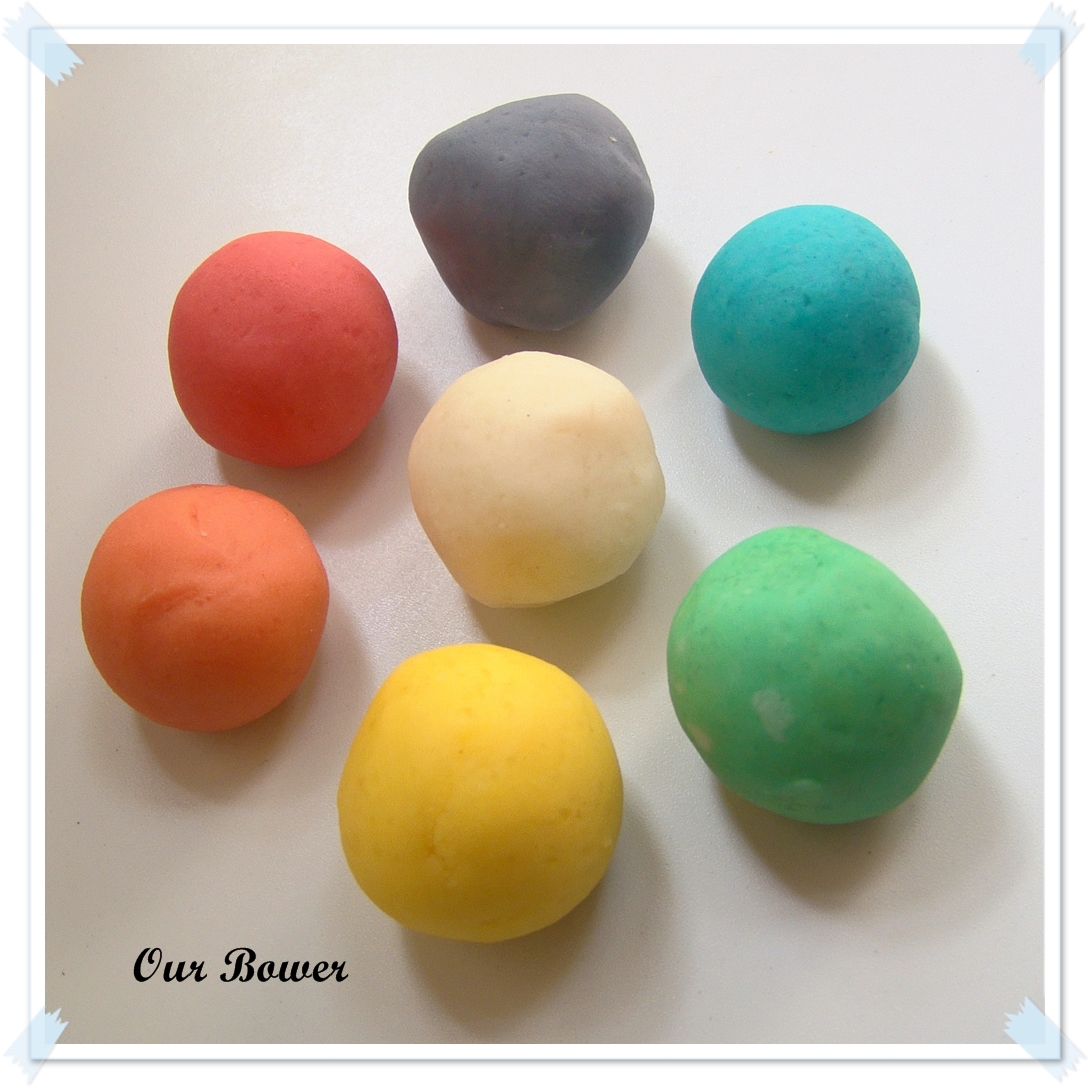
Which is why I LOVE homemade playdough.  Cheap enough to chuck when it's turned grotty, safe enough to be ingested and so many colors to choose from!   If it's stuck on clothes, soak the clothes and then the dough dissolves and you can rinse it out with no problems!
The sky is literally the limit with these things.  I bought a cheap rolling pin and a set of cookie cutters, added some plastic utensils and recycle some plastic food containers and the viola!  A cheap toy that entertains the little one for hours at a time.
One other thing that I have found playdough to be particularly useful is in training the little one in how to use the scissors. I bought him a safety scissors that is made of plastic.  Unfortunately, it actually takes more skill than a normal scissors to cut nicely through paper.  However, with the playdough, no problems at all!  And he doesn't get himself nicked.
I'm hoping to teach colors using playdough and mixing them up. But seeing how the tot can't even consistently identify basic colors, I may have to leave it to later!

I've tried many of the recipes online and find that the cream of tartar version the best.  The recipe using baking soda and cornstarch resulted in a rather slimy afterfeel which I didn't like at all.  The "no cook versions" are largely similar to cooked versions seeing how boiling water is used. I use the no cook version as that allows me to involve the tot in the mixing.  He mixes with a wooden spoon in a huge mixing bowl and only after I've mixed the mixture enough to not have any liquid in the bowl.  The boiled version tends to result in a salt crust on the dough after a while so I don't really fancy that method either.

There are a thousand and one recipes online and this is the base recipe.  A lot of people add flavors and such to the dough and yes, they smell delicious!  But I don't.  There really is no need to encourage my greedy tot to mouth the dough with the delicious smells even if it's safe.

Here's the recipe I use!  Do you have any non toxic recipes for crafts for children?  I would love to hear from you!

Playdough
1 cup all purpose flour
1 cup boiling water
1 tbs of cooking oil
1/2 cup salt
4 tablespoons cream of tartar
food coloring
  1. Combine the flour, salt and cream of tartar in a mixing bowl.
  2. Mix the cooking oil with the boiling water.
  3. Pour the boiling water over the dry ingredients and mix continuously until smooth.
  4. Knead in your preferred food color.
Have fun!

12 March, 2011

Pinterest!

I've recently seen Pinterest popping up on many of my favorite blogs.  When I went to find out what it was all about, I was psyched!  What a cool idea.  Unfortunately I needed an invite.  So I signed up thinking that I may never get an invite and I just got it!

It's terribly addictive but I love how I can bookmark stuff so easily and retrieve them from anywhere!  Fantastic!

You can find me at Pinterest here!

Round and round we go!


When I saw this at abstractoctopus, it went straight to one of my book marks.  I wanted a less bulky look so I cut up my magazine papers into 1/16s and folded that down halfway.  Me and my ambition - I paid sorely for that.  I was tearing magazines for days!

Instead of gluing it and using a bulldog clip to hold it together, I just rolled it into 1 big roll using scotchtape to join up the papers.  Then I used my glue to spread it all over and allow for it to seep between the cracks.  I'm out of modge podge but the normal glue seemed to work just fine!

The tot has staked his claim on it already and has been using it for his doodads.  It was fun making but I doubt I'll make another one.  Too time consuming for impatient ole me!

Do you have any other ideas on how to make fancy boxes out of magazine paper?

Have a look here for more ideas on how to use up those magazines!

09 March, 2011

Braised pork shoulder - ignore the fat


Do you like kong bak? The sinful layers of fat that melt in your mouth in a sweet yet savory sauce. Delicious! Just ignore what your doctor said about avoiding too much fat.

There are many recipes online for fancier versions that definitely do better in the looks department (think tying the meat chunks with pandan leaves to keep the shape) but also take a lot more time. However, being a mum (working or not) means there may be certain things one has to foresake for the sake (pun not intended) of sanity – so I am forced to choose ease over appearance.


The recipe I have is dead easy and a perfect 1 pot dish (minimal washing!) which makes me one happy camper. The meat is succulent and tender and the sauce goes great with rice too. The dish keeps well overnight and when I heated it up in the microwave the next day, the fat just melted in my mouth. I must say I now know what to blame for the expanding waistline!

Braised pork shoulder
Ingredients
0.5kg pork shoulder with skin intact
½ red onion diced
1 garlic bulb peeled
2 tbs Shaoxing wine
1 cup dark soya sauce
1 cup light soya sauce
4 pieces of rock sugar
1 tsp five spice powder

Method
  1. Scald the pork shoulder with boiling water and blanch into ice cold water to stop the cooking process.
  2. Remove the hair from the pork shoulder skin.
  3. Using a pot that would fit the meat, sautee the garlic (whole cloves) and red onions gently until fragrant.
  4. Add the rest of the ingredients into the pot including the chunk of pork shoulder.
  5. Add enough water to cover the meat and bring to a boil. Once boiling turn the fire down and simmer for 1 – 2 hours.
  6. Serve with green vegetables and rice (To assuage the guilt.)
Notes
  1. Scalding helps to make the hairs more apparent and easier to remove. Furthermore, it is supposed to help remove some of the smell. (I can't really tell)
  2. Avoid using a pot too big as it would require more water to cook the meat and dilute the flavors.
  3. You can hard boil an egg (or eggs) and shell them. Then pop them in with the meat when simmering to get very tasty eggs that children love!

07 March, 2011

Weetabix clusters


I remember as a child, I was very facinated by cornflake clusters. Reason being that my mother never baked and it was a treat since they didn't really sell them commercially either. When I grew up, my cousin made very good ones chockablock full of nuts and sesame seeds. Each bite was a study in nutty fragrances, balanced by a slightly salty caramel and buttery aftertaste. YUM! But she only made it during Chinese New Year.

So that day I was craving cornflake clusters and decided that since I was an adult now, I'd make them myself. So quite unlike my usual self, I just started without even checking that I had cornflakes. Yup. I had the butter melting in the pot with the honey, the almonds toasted and chopped and no cornflakes. Sigh. My stomach had obviously ran ahead of the brain.

Digging around in the pantry resulted in some Weetabix which would have to do. The result was actually quite good! Unfortunately, the Weetabix tended to absorb all the caramel and didn't hold as well as cornflake clusters would. But that didn't really matter since everyone was popping the entire cluster into their mouths at a shot.  A big hit with the kiddy crowd too!

Do you have any snacks that just bring back all those childhood memories?

Weetabix clusters
Ingredients
7 pieces of Weetabix
75g butter
3 tbs sugar
3 tbs honey
1 cup almonds
1/3 cup sesame seeds

Method
  1. Preheat oven to 180 degrees Celsius.
  2. Blitz weetabix, almonds and sesame seeds in a food processor until coarsely chopped.
  3. Melt butter, sugar and honey in a saucepan and pour over the dry ingredients and mix.
  4. Scoop mixture into small cupcake cases.
  5. Bake for 5 minutes and take out to cool and set.
  6. Keeps in an airtight container for about 1 week (provided greedy fingers don't get to it first!)
Notes
  1. You can use other nuts if you like.
  2. It's a great way to "freshen up" breakfast cereal that has lost it's punch.

05 March, 2011

Home made rubber balls...


Do you remember the rubber band skipping ropes we made as children to play "Zero point" and those rubber balls that would bounce almost as high as the point at which they were dropped?  I do.  And when I googled zero point, it said it was a "traditional" game.  That made me feel old in an instant!

Anyhow, the tot is too young to play zero point and I had a lot of rubber bands.  So I thought, why not make a rubber ball with them?  So I wound rubber bands over one another repeatedly.  It's that brainless and easy.

The ball bounces quite well but I would highly recommend that you do not encourage any throwing - it hurts if you are hit with it!  And play with it outside.  The window can shatter from the impact.  It's that solid.

01 March, 2011

For the tiny picky eaters - steamed egg custard

I'm sure those of you who have toddlers, finding the one dish that is both nutritious and pleasing to their palate can be quite a challenge.  Eggs are a wonderful source of nutrition especially the egg yolk.  But not all children like eating the yolk.  I know I didn't when I was a kid!  So this is a great way of getting both yolk and white into the mouth and it's so easy to do - once you know the trick!

Both Chinese and Japanese cuisines feature this dish with variations in the ingredients.  It is not so much the ingredients than the method (am I repeating myself too much here?) that gives the perfect smooth jello texture that is a great hit with the kids.

As with many of the "traditional" recipes I use, it's a pinch of this and a little bit of that.  So please bear with me!

Steamed egg custard
Ingredients
2 eggs
Water
2 pinches of salt.
Spring onions for garnishing

Method

  1. Prepare steamer and boil the water.
  2. Crack 2 eggs into a measuring cup and add 2x the amount of water.  Add the salt and beat the mixture until homogenous.  You can add pepper if you want.
  3. Pour mixture through a sieve into container you want to steam the egg in.  Use a container that can be placed in a steamer.
  4. Place egg into steamer and turn down the heat from the stove.  
  5. Take the eggs off the stove once it turns a light yellow (from translucent yellow)
  6. Garnish with spring onions.
Notes
  1. I use a measuring cup to make it easy to gauge how much water to add.  It's a 1:2 ratio I use.  1:1 gives a firmer texture if you prefer that.
  2. You can use chicken stock or dashi stock (for chawanmushi) instead of water.  But the kids don't seem to notice the difference.
  3. You can add things like ginko nut, fish cake and such to make a more interesting dish.  I prefer not to as it increases the surface area where bubbles can form and ruin the smooth texture.  I'm anal like that.
  4. Do NOT boil the egg mixture.  The idea is to get the egg to just cook.  I use a steamer with a clear lid so I can peek in to see if the egg has cooked.  I get the steamer to a boiling point and turn the fire down to the minimum so that the water simmers.  Once the egg sets, I turn off the fire and leave the egg in the steamer until it's time to serve.  
  5. If you are using a hot plate, you will need to remove the entire steamer off the stove as the water can continue to boil.