25 February, 2011

Waste Not, Want Not

I'm not sure about you but I'm a sucker for beauty free samples.  Not that I actually end up using them most times.  It's just the thought of getting something free that really makes me excited and results in me buying more things (read: probably unnecessary things) just to get enough points to get something free!

Now that's probably not a good method of money management, even if it makes the merchants very happy.  The bottom line is that you have spent more than you had originally set out to.  So I've decided to save me some money!  Here's the plan:
  1. Sort through all my samples: 
  2. Chuck out anything that looks or smells dodgy, is past the expiration date or I definitely wouldn't use (e.g. foundation that isn't my color).
  3. Categorize to product type and arrange according to expiry date (or at least as chronologically as I possibly can.)
  4. Not buy any product unless I've finished what I have in hand.
  5. Be really disciplined and avoid the same trap again.

I've gone through the last month using just samples and I still have this much left.  There's definitely a lot less clutter around the toilet and I have the satisfaction of watching the pile dwindle.  I've also definitely saved at least $50 on products so far.  Once I finish the samples, I'll share with you my plan with the full sized items!

23 February, 2011

Teaching tiny fingers on the cheap


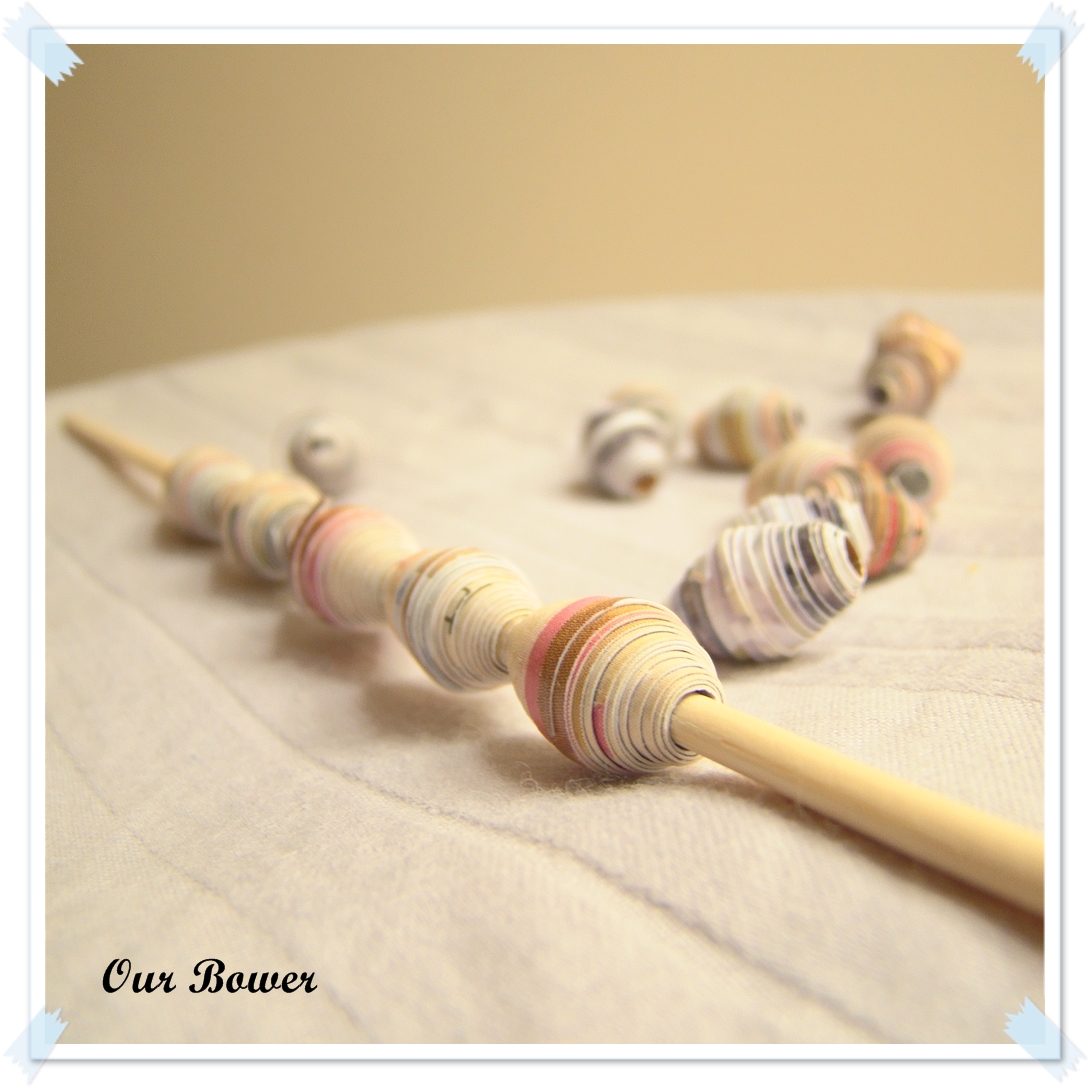
It's important for toddlers to practice their fine motor skills as this helps them learn to use their fingers and improve their dexterity.  One of the recommended activities is to string up pasta with a string to form a necklace. However, I'm not exactly keen that the tot "plays with food" as I'm concerned that he would get confused with real food.


My solution?  Paper beads!  With my stack of magazines growing, I had lots of material.  It's a very, very simple project and you can even involve your child in making them.  After the beads dried, the tot has been having fun threading them onto the stick again.  He also uses them to count and treats it like "money"!

Paper beads
Material
Colorful paper
Ruler
Pen knife
Glue
Satay stick

Instructions
  1. Using the ruler, cut the paper into long triangular strips.
  2. Apply a small amount of glue to the paper on the "wrong" side of the paper (the side that is to be hidden).
  3. Using a stick, roll the paper tightly around it, starting from the broader end.
  4. Allow glue to dry before removing from the stick.
Tips
  1. Heavier paper gives you larger beads, as with longer strips of paper.
  2. You can use "wet glue" or tape glue.  Tape glue may be less messy but trickier for toddlers - I don't let my tot near it as he ended up unwinding the entire reel once!
  3. Varying the width of the strip's base varies the length of the bead.
  4. You can actually spray the beads evenly with lacquer if you intend to wear these beads!
Have a look here for more ideas on how to use up those magazines!

21 February, 2011

Using up those magazines

Looking at the stack of old magazines that I had ploughed through, part of me said "Just chuck them in the recycling bin!".  Another part said "What could you do with these?"  So this is the list that I made:
  1. Using it to wrap breakable things for packing - it sure beats the carbon that is left behind from the newspapers we usually use.  Much cleaner in my opinion!
  2. Shredding it and using it as stuffing in wrapping presents - cheaper than using new colored paper.
  3. Make disposable boxes - very useful for messy craft times and dinners with loads of cast offs e.g. crab eating sessions
  4. Make paper chains - fast and easy decoration for parties and the like
  5. Origami - endless possibilities!
  6. Make paper beads - the kids love it for stringing or playing.  Their imagination is the limit!
  7. Make paper dolls - I love cheap toys that allow children to use their imagination.  Can you tell?
  8. Make collages - I remember doing this when I was in Primary school!
  9. Paper basket weaving - great as containers!
  10. Paper boxes - it can look nicer than you think!
Hopefully, I'll be able to put up some photos of the above projects (if I get to do them!) over time with instructions.  Watch this space!

19 February, 2011

Chocolate muffins with orange cream cheese

The internet has been a great place from which I draw my inspiration from, be it craft, food, child rearing or decorations.  But it has also meant that I've ended up buying things in the hope that one day, I'll find the time to create whatever it was that I was inspired to make.  As we all know, that may be almost never.  It's fine with craft materials but with food, there are expiry dates.
In order to assuage my conscience, I did a sweep of the pantry for any more food that needed to be consumed (This is becoming quite a habit, yes?  Remember the black sesame soup?)  Anyhow, I found a packet of cooking chocolate, baking cocoa powder, half consumed cream cheese and an orange.  Perfect to execute an idea that I've been having in my head for quite a while - Chocolate muffins with orange cream cheese.

I'm quite sure this is not a new idea - I'm not that imaginative in the food department yet.  And by yet, I mean that I expect to become more adventurous.  And by more adventurous, I mean buy more exotic ingredients... (Down that slippery slope yet again.) 

As a child, I'd always hated orange flavored chocolates.  Don't get me wrong - I LOVED chocolate and I LOVED oranges but put them together, it was just wierd.  I suppose part of the reason was the rather synthetic taste that those cheap boxes of chocolates tend to impart with this combination.  But now that I've grown up and I've actually tried some really nice combinations with fresh fruit and good quality chocolate, I'm quite partial towards it.
Do you have any combinations of food that you hated as a child but embraced it as an adult?

Chocolate muffins with orange cream cheese
Makes 18 muffins
Ingredients
Group A
2 3/4 cup all purpose flour
2 tsp baking powder
3/4 cup baking cocoa powder
0.5 cup caster sugar
Group B
2 tsp vanilla essence
80g milk chocolate chips / chocolate bar broken up into bits
2 large eggs
150g melted butter
1 3/4 cups of milk
Group C
125g cream cheese at room temperature
2 tbs caster sugar
3 tbs fresh orange juice
1.5 tbs orange zest
0.5 tsp vanilla essence
Method
  1. Preheat oven to 180 degrees Celsius.
  2. Combine all the ingredients in Group A and whisk to mix.
  3. Combine all the ingredients in Group B and whisk to mix.
  4. Pour Group B ingredients into Group A ingredients and stir until just combined.
  5. Combine all the ingredients in Group C and put in a food processor and blend until smooth.
  6. Fill greased muffin tins until 1/2 full with the chocolate mixture.
  7. Place a dollop of cream cheese mixture on top of the chocolate mixture.
  8. Further top up the muffin tinx with the chocolate mixture to cover the cream cheese mixture.
  9. Bake for 20 - 30 minutes.
  10. Best eaten warm from the oven!
Note
  1. I tend to use less sugar in my recipes as I dont' like it too sweet - you can vary the amount of sugar to your liking,
  2. You may need less milk (or more) to get a consistency thicker than honey to allow for ease in filling the muffin tins.

17 February, 2011

Who? 芝麻糊 - Black Sesame Soup

While going through my pantry, I found a packet of black sesame seeds.  To be honest, I can't really remember why I bought it in the first place.  Perhaps I'll stick a post-it next time with my idea onto the food packets so that I'll remember! LOL!

Anyhow, I was talking to my grandmother the weekend before and she mentioned that 芝麻糊 was very easy to make and considering the ingredients, dirt cheap.  As with A LOT of recipes from the older folks, there aren't any precise measurements, just proportions.  

So I used one of those Chinese soup bowls as my measuring container.  I figured it would be just nice.  Afterall, it was a nice size.  Right.  The brain didn't think properly and I didn't add up ALL the bowls.  Ah well.  We had a whole pot full of 芝麻糊 which could feed a party of 10 or more. LOL!


Black sesame is supposed to be good for black hair (As with a lot of Chinese food believes, you treat like with like) and neutral for the body.  Scientifically, it has a tonne of vitamins and minerals along with some fibre.  Sounds like something that everyone can enjoy!

Black sesame paste 芝麻糊
Ingredients
1 cup of black sesame seeds
1 cup of jasmine rice
1 cup of yellow rock sugar
9 cups of water

Method
  1. Soak the jasmine rice in some water after washing for 1 hour.
  2. Toast the black sesame seeds in the oven at 160 degrees Celsius for 20 minutes.
  3. Grind the sesame seeds to a fine powder in the food processor.
  4. Strain the rice and grind that to a fine meal as well.
  5. Add the sesame meal and rice meal to 9 cups of water.
  6. Bring the pot to a simmer, stirring every now and then, ensuring that the rice doesn't stay at the bottom of the pot and burn.
  7. Add the rock sugar and stir until it melts.
  8. Using a food processing wand, blend the soup into a smooth creamy consistency.
  9. Can be eaten cold or warm.
Note
  1. The above gives you about 10 bowls of soup.  Cut down as necessary.
  2. You can use plain rice flour instead of jasmine rice - this saves you 1 step.
  3. This soup is best eaten fresh as the rice starch tends to congeal and may separate after some time.  If that happens, I'd heat up the soup and add a bowl of boiling water and blend again.